

Heroku Is Ending Its Free-Tier. Here’s How To Deploy Apps Using Render
Behold the free Heroku alternative!


On November 28th, Heroku's free tier will no longer be available. It may become slightly annoying to most of us who want to deploy servers at no extra cost, with ease. The removal of free tier forces us to either move elsewhere or give into their paid plans.
In this article, I will show you an upcoming alternative, Render. Render provides the same features as Heroku but with improvements and bonus features.
Setting up
To deploy our app to Heroku's mighty successor, you'll need accounts at both Render and GitHub. You also need an app to deploy. You can find the final code for the AI Assistant series here.
Adding code to GitHub
First, create a new GitHub repository. Now run the following commands to push our code to the repo.
git init

git add .
git commit -m "first commit"
git branch -M main

git remote add origin git@github.com:USERNAME/REPO.git

git push -u origin main
Now that our code is on GitHub, we can deploy it to Render.
Deploying on Render
Once you have signed up, click Web Services on the dashboard page to create the app.

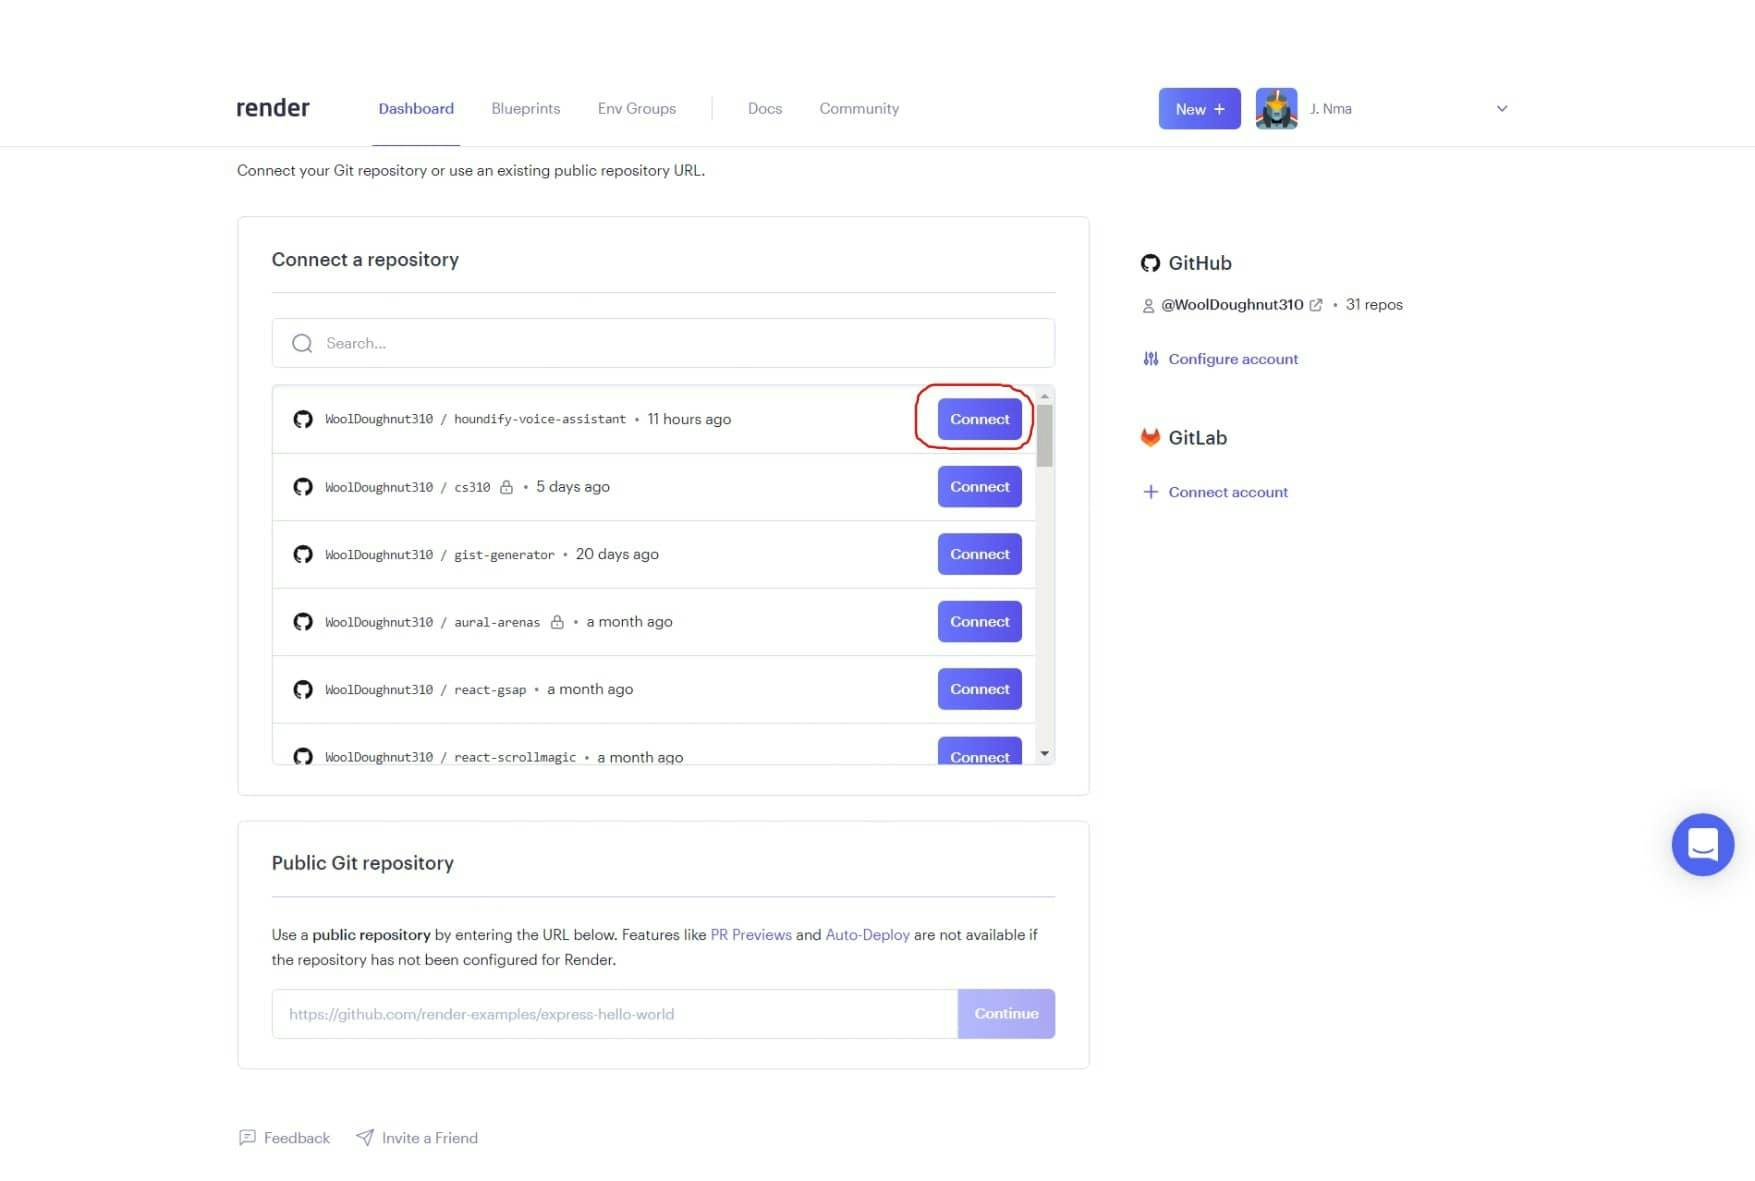
Next, configure your GitHub account so that Render can access your repo. Then click Connect next to the repo name.
Now fill in the details in the form. If you pushed the code correctly, the environment should already be set to "Node".
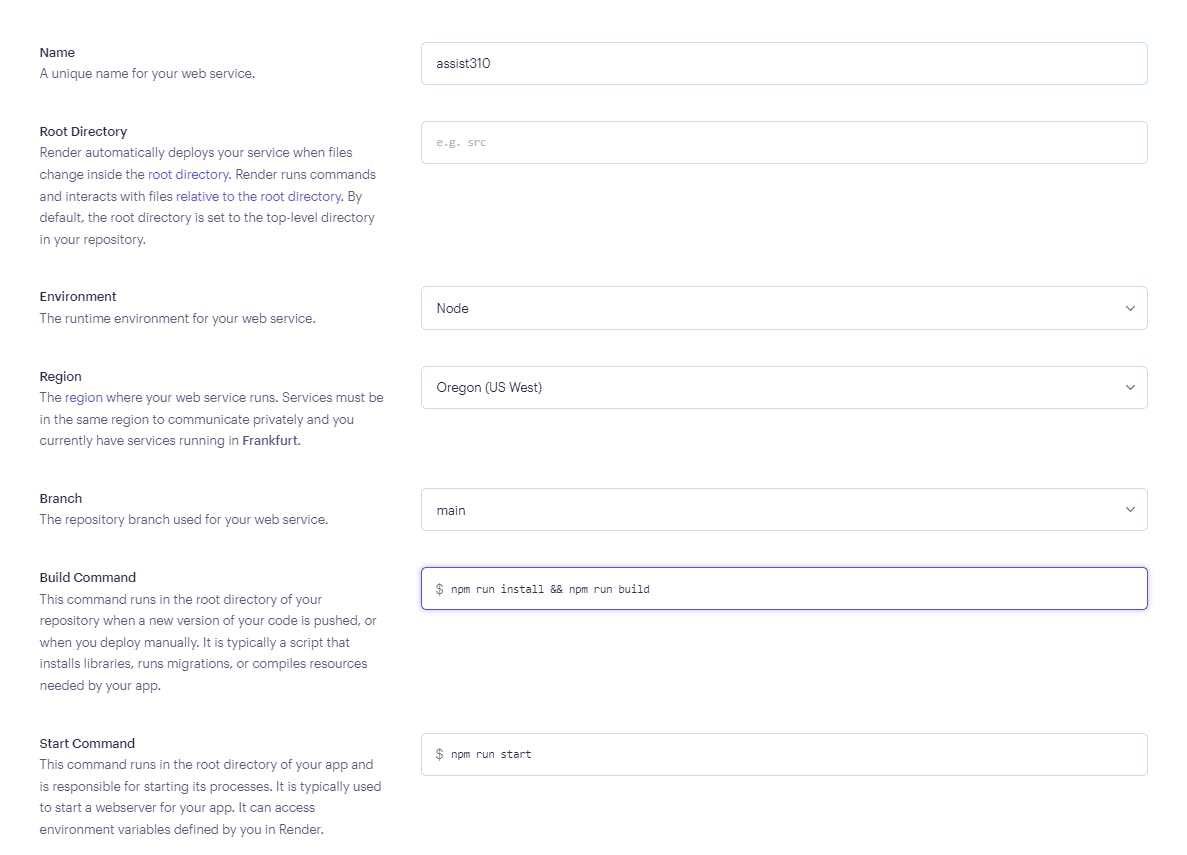
Note that we have to install our NPM packages before running build.
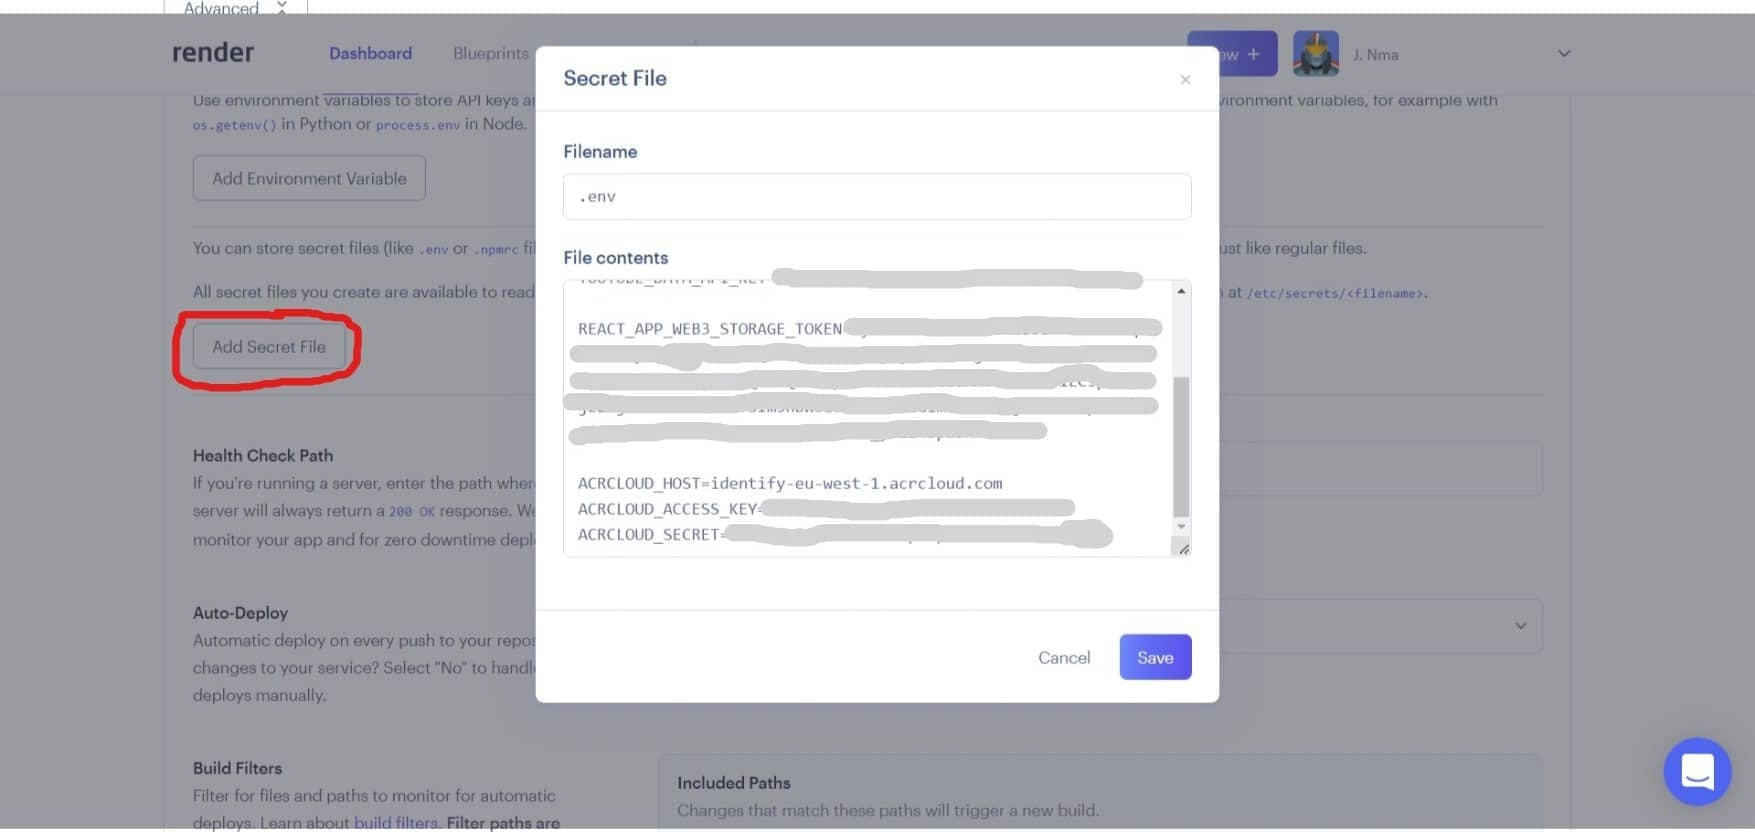
Scroll down to the button labelled Advanced and click. Now click on Add secret file to open a modal dialogue. Set the filename to ".env" and fill the contents with the contents of your .env file from previous articles.
To finish things up, click Create Web Service. After a few minutes, Render should have deployed your application. They even provide a domain to test it out.
Comparison to Heroku
If you're already a habitual user of Heroku, switching to Render is seamless. Even if you're a paying user of Heroku, I will now outline a brief comparison between each.
Pricing
Heroku has a much less lenient pricing scheme with only three plans. Render has eight different plans to provide more flexibility based on your usage.
Disk storage
Render supports disk storage to store data between deployments. Heroku does not offer this.
HTTP Version
Render servers your applications over HTTP/2, which offers better speed and efficiency. Heroku still uses HTTP/1.1.
Health Checks
With Render, users can provide paths to Health Checks, so your app can restart if something is wrong. Health Checks allow Render to have no downtime. Heroku apps restart every 24 hours, which may lead to downtime. The only way to avoid this is to upgrade from the Free Tier.
DDoS Protection
Render provides advanced DDoS protection for all your applications. However, Heroku provides more basic methods. They even recommend using a dedicated service to handle stronger attacks.
TLS Certificates
Render provides free and automated TLS certificates for applications on custom domains. Heroku does not.
Docker
Using Render, you can include a Dockerfile in your repository. They will then recognise it and automatically build it. Heroku's process of Docker deployment is much more tedious.
Secrets
Secret files can be imported into Render. Heroku only has support for Config Variables (env variables), which is limited.
Postgres
Render has managed Postgres instances. Render has a free tier available for 90 days. Render's free tier instances have a higher connection limit than Heroku (97 vs 20). Their DB instances all have IP access control unlike Heroku's Postgres addon. Render takes daily backups of all Postgres instances and retains them for a week. Heroku only retains a max of 2 backups on their free tier.
Redis
Render also has managed Redis stores with a free tier. This free tier is available with no end. Render's Redis instances allow 2.5 times the connection limit of Heroku's Redis addon (50 vs 20). However, both platforms require upgrading if you want to persist data to the disk. Instances from Render also allow IP access control unlike Heroku.
Conclusion
You now know how to initialise a Git repository, push it to GitHub, and deploy it to Render for free.
If you've read the entire series from start to finish, congratulations. I truly appreciate it.
And if you've enjoyed this series, feel free to follow me for more content and share it with others. Thank you!