


Happy New Year.
Today, I will show you how to get started with SvelteKit. Using our project, users will be able to share mathematical formulas. Others can view formulas and test them out with their variables.
SvelteKit
SvelteKit is a framework for building web applications on top of Svelte, a UI component framework that developers love for its performance and ease of use.
Normally I would have leaned towards using Next.js. However, after having tried Svelte for the first time, I just had to write an article using it.
My favourite aspect of Svelte would have to be the significant reduction in boilerplate code, as compared to React.
At the end of last year, the first stable version of SvelteKit was released. This means we can be excited about the future of web development.
Get started today by running npm create svelte@latest my-app in your terminal.
Setting up
When you run the above command, the process will ask you questions about tooling. Opt for a Skeleton Project with Typescript. The rest is up to you.
Now follow its instructions and open the folder in your favourite editor.
Read more about the SvelteKit project structure. For the remainder of this article, I will mention the $lib folder to refer to /src/lib.
NPM packages
We need the following packages from NPM:
npm i firebase mathjax-svelte mathjax-full@3 mathjs svelte-icons sveltefire
mathjax-svelteprovides a Svelte component to display maths, usingmathjax-fullsvelte-fireis a Firebase wrapper for Sveltemathjsparses mathematical expressions
Also, read how to install TailwindCSS with SvelteKit.
Firebase
Before building this application, you will need a Firebase project with a Firestore database. Get started with Cloud Firestore.
Create firebase.ts in the lib folder to initialize the app.
import { initializeApp } from 'firebase/app';
import { getFirestore } from 'firebase/firestore';
import { getAuth } from 'firebase/auth';

// Replace the following with your app's Firebase project configuration
// See: https://firebase.google.com/docs/web/learn-more#config-object
const firebaseConfig = {
    // ...
};

export const app = initializeApp(firebaseConfig);
export const firestore = getFirestore(app);
export const auth = getAuth(app);
Firestore
The only Firestore collection we will be using will be named "formulae". To secure our data, we will add the following security rules:
rules_version = '2';
service cloud.firestore {
  match /databases/{database}/documents {
    match /{document=**} {
      allow read, write: if request.auth != null;
    }

    match /formulae/{id} {
        allow read: if true;
    }
  }
}
Back to our project. We will create a type interface for formulae documents, then export a collection wrapper in $lib/firestore.ts :
import { type DocumentData, type CollectionReference, collection } from 'firebase/firestore';
import { firestore } from './firebase';
import type { Formula } from './types';

const createCollection = <T = DocumentData>(collectionName: string) => {
    return collection(firestore, collectionName) as CollectionReference<T>;
};

export const formulaeCol = createCollection<Formula>('formulae');
And in $lib/types.ts:
export interface Formula {
    // To check if the current user owns the formula,
    // so they can edit it if needed
    userId: string;
    title: string;
    // Displays the name of the formula creator
    author: string;
    formula: string;
    variables: { [key: string]: { label: string; base: number } };
}
Authentication
Users of the application will be able to log in via their Google accounts. Read the Firebase docs to learn how to authenticate your project using Google.
Create a new component in the $lib folder named GoogleLoginButton.svelte and add the following code:
<script lang="ts">
    import { GoogleAuthProvider, signInWithPopup } from 'firebase/auth';
    import IoLogoGoogle from 'svelte-icons/io/IoLogoGoogle.svelte';
    import AuthButton from './AuthButton.svelte';
    import { auth } from './firebase';

    const provider = new GoogleAuthProvider();
</script>

<AuthButton title="Sign in" on:click={() => signInWithPopup(auth, provider)}>
    <IoLogoGoogle slot="icon" />
</AuthButton>
And we also need a button to sign the user out, which can be done with this code (in $lib/LogoutButton.svelte ):
<script lang="ts">
    import { signOut } from 'firebase/auth';
    import { auth } from './firebase';
    import AuthButton from './AuthButton.svelte';
</script>

<AuthButton title="Sign out" on:click={() => signOut(auth)} />
Now, to implement the AuthButton that needs an on:click handler, a title prop to pass as a child, and an optional slot for an icon, all we need is this:
<script lang="ts">
    export let title: string;
</script>

<button
    type="submit"
    class="px-4 py-3 flex flex-row items-center bg-gray-300 hover:bg-gray-400 shadow-[4px_5px_0] shadow-gray-500 rounded-xl font-semibold"
    on:click
>
    {#if $$slots.icon}
        <div class="w-4 h-4 mr-2 ">
            <slot name="icon" />
        </div>
    {/if}
    {title}
</button>
App Layout
Our layout will be shared among every route we build in this article. It features a header which displays the authentication buttons and the user's profile information.
We use svelte-fire to handle changes to the authentication state and get the current user.
Add the following code to src/routes/+layout.svelte :
<script lang="ts">
    import '../app.css';
    import { firestore, auth } from '$lib/firebase';
    import { FirebaseApp } from 'sveltefire';
    import User from 'sveltefire/User.svelte';
    import GoogleLoginButton from '$lib/GoogleLoginButton.svelte';
    import LogoutButton from '$lib/LogoutButton.svelte';
</script>

<FirebaseApp {auth} {firestore}>
    <header class="flex flex-row items-center p-3 border-b-2  border-b-gray-300 shadow">
        <h1 class="text-3xl font-bold mr-auto"><a href="/">Formula Space</a></h1>
        <User let:user>
            <div class="flex items-center space-x-2">
                <LogoutButton />
                <div class="flex items-center space-x-3 px-4 py-1 bg-gray-300 rounded-2xl">
                    <img alt="Profile" src={user.photoURL} referrerpolicy="no-referrer" class="w-8 h-8" />
                    <span class="font-semibold">{user.displayName}</span>
                </div>
            </div>
            <GoogleLoginButton slot="signedOut" />
        </User>
    </header>
    <main>
        <slot />
    </main>
</FirebaseApp>
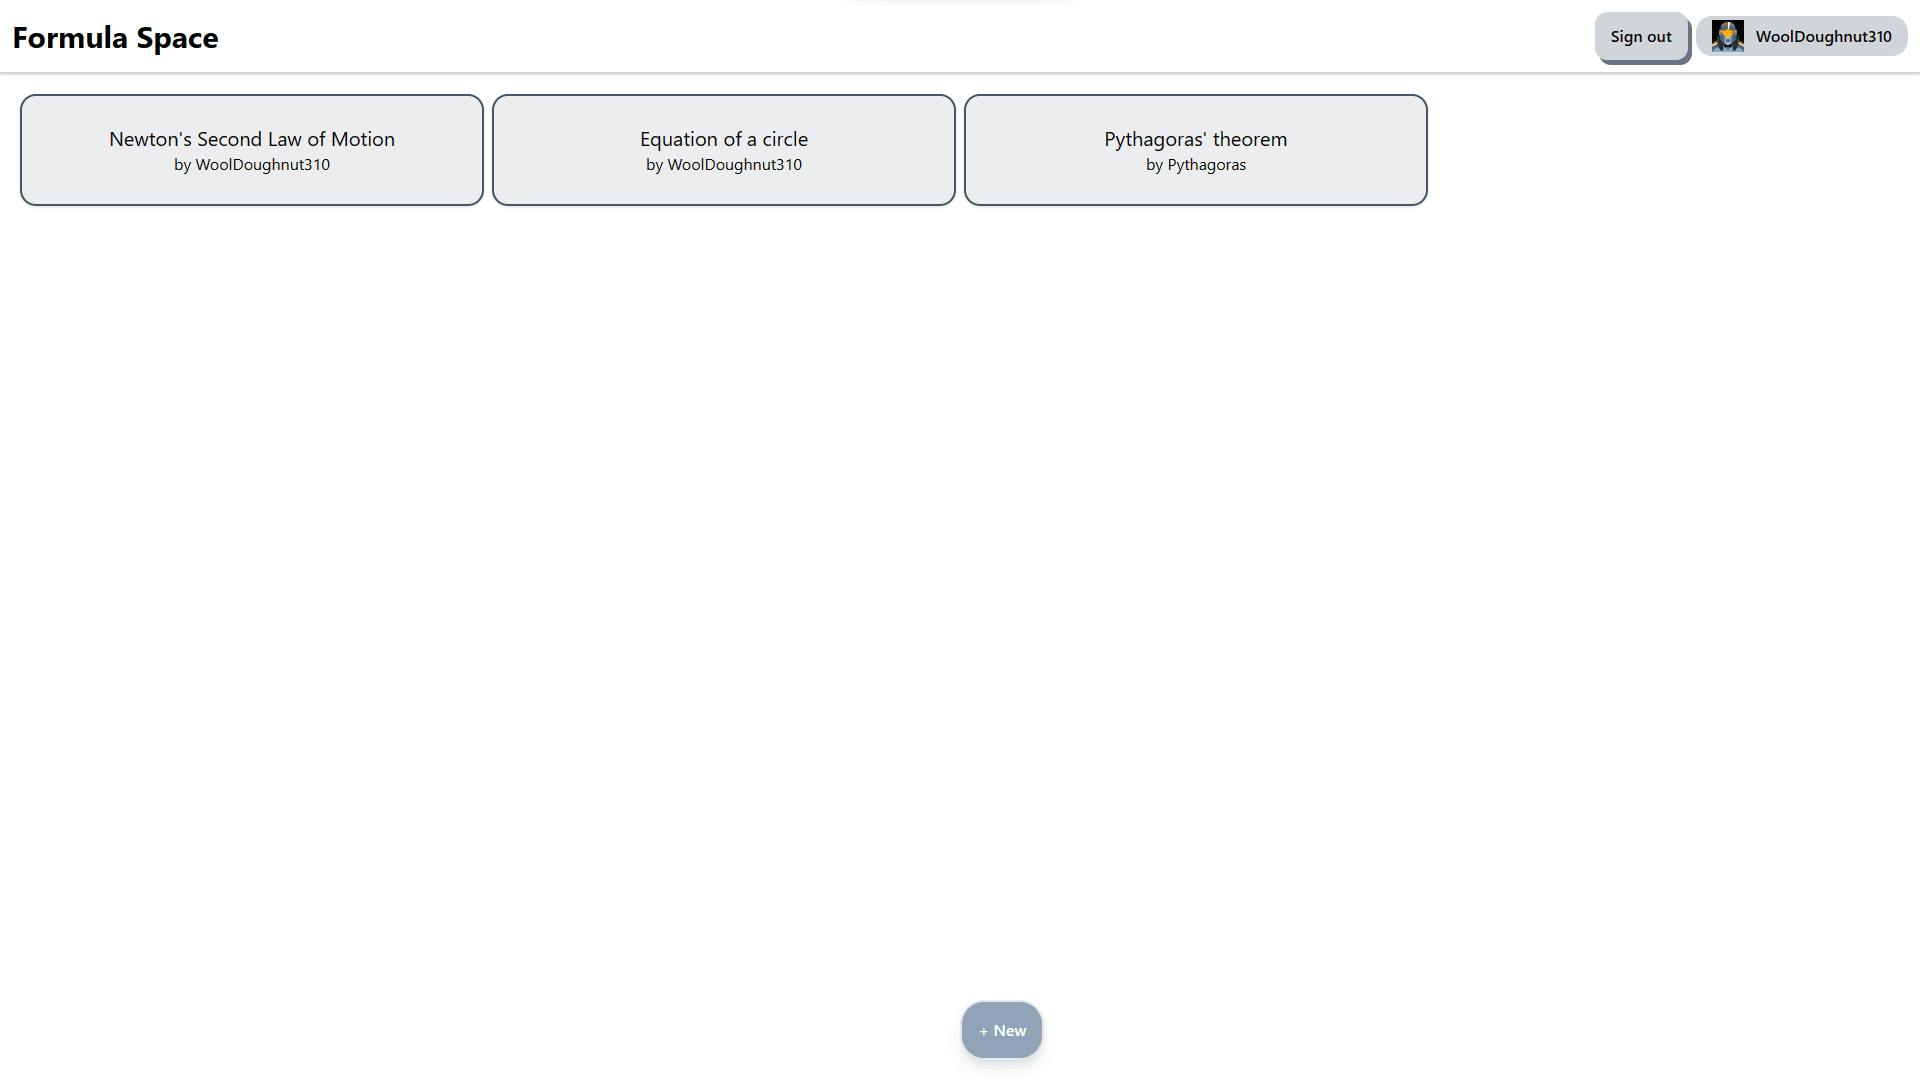
Listing Page
Here, we display a preview of every formula in the database, along with a button to navigate to the creation page.
<script lang="ts">
    import { goto } from '$app/navigation';
    import FormulaPreview from '$lib/FormulaPreview.svelte';
    import IoIosAdd from 'svelte-icons/io/IoIosAdd.svelte';
    import { Collection } from 'sveltefire';
</script>

<svelte:head>
    <title>Formula Space</title>
</svelte:head>

<div class="p-5 grid grid-cols-4 gap-2">
    <Collection ref="formulae" let:data>
        {#each data as formula (formula.id)}
            <FormulaPreview id={formula.id} data={formula} />
        {/each}
    </Collection>
</div>
<button
    type="button"
    on:click={() => goto('/create')}
    class="flex flex-row mx-auto absolute left-1/2 bottom-5 rounded-3xl p-4 border-gray-200 border-2 fdaf bg-slate-400 hover:bg-slate-300 text-white shadow-lg font-semibold"
>
    <div class="w-6 h-6 mr-2">
        <IoIosAdd />
    </div>
    New
</button>
Formula Preview
We will display the author's name and title, along with a link to the formula's main page. Add the following code to $lib/FormulaPreview.svelte :
<script lang="ts">
    import type { Formula } from '$lib/types';

    export let id: string;
    export let data: Formula;
</script>

<a href="/{id}" class="active:translate-y-4 active:translate-x-4 transition-all">
    <div
        class="shadow flex flex-col justify-center p-3 h-28 border-slate-600 border-2 rounded-2xl bg-gray-200/75 text-center"
    >
        <h3 class="text-xl">{data.title}</h3>
        <span>by {data.author}</span>
    </div>
</a>
Creating a Formula
The route for this page will be /create . Begin by adding the imports and displaying an input to change the title.
<script lang="ts">
    import { page } from '$app/stores';
    import { goto } from '$app/navigation';
    import { auth } from '$lib/firebase';
    import { formulaeCol } from '$lib/firestore';
    import { parseNodes } from '$lib/math';
    import { Math } from '$lib/mathjax-svelte';
    import TableInput from '$lib/TableInput.svelte';
    import type { Formula } from '$lib/types';
    import { addDoc, doc, getDoc, setDoc } from 'firebase/firestore';
    import { parse, type MathNode } from 'mathjs';
    import { userStore } from 'sveltefire';
    import { onMount, tick } from 'svelte';
    import FormulaInput from '$lib/FormulaInput.svelte';
    import FormulaSubmitButton from '$lib/FormulaSubmitButton.svelte';

    let title = '';

    // ...
</script>

<svelte:head>
    <title>Creating {title ? `"${title}"` : 'new formula'}</title>
</svelte:head>

<div class="p-4 text-center container mx-auto">
    <div class="p-5 flex justify-center items-center rounded-xl bg-gray-300/40">
        <input
            class="text-3xl font-semibold w-full text-center bg-transparent outline-none"
            bind:value={title}
            placeholder="Enter formula title"
        />
    </div>
    <!-- TODO -->
</div>
We can now add a preview of the user's formula, or an error message if there was any parsing issue.
<script lang="ts">
    // ...
    let latex = "";
    let error = "";
    // ...
</script>

<!-- ... -->

<div class="p-4 text-center container mx-auto">
    <!-- ... -->
    <div
        class="mt-12 mx-10 bg-gray-300/50 rounded-2xl h-24 flex justify-center items-center text-2xl shadow-lg"
    >
        {#if error}
            <span class="font-mono">{error}</span>
        {:else}
            <Math display={false} class="w-full h-full flex justify-center items-center" t={latex} />
        {/if}
    </div>
</div>
And to take input from the user, we can use a FormulaInput component which will be defined in our $lib folder:
<script lang="ts">
    // ...
    let math = "";
    // ...
</script>

<!-- ... -->

<div class="p-4 text-center container mx-auto">
    <!-- ... -->
       <FormulaInput on:input={() => (error = '')} bind:math />
</div>
With this arrangement, any error displayed before will be cleared once the input is changed. The input component is defined with the following:
<script lang="ts">
    export let math = '';
</script>

<input
    placeholder="Enter formula"
    type="text"
    class="mx-auto my-10 flex flex-row text-center items-center w-1/2 h-16 bg-gray-300/40 border-2 border-slate-600 rounded-lg"
    on:input
    bind:value={math}
/>
Our page will show a table with fields to set the label and the default value of each variable in the formula. Using a reactive statement, we need to first parse the input with mathjs. Then, we convert the output "node" into latex, but also figure out which variables the formula uses, and which variable is on the left-hand side.
$$f = x^2 + 6xy + y^2$$
In the example above, f would be the assignment, whilst x and y would be the symbols used.
mathjs provides us with a node.traverse method to find all the different nodes in the formula. Nodes in mathjs refer to anything including assignments, symbols, constants and functions (e.g. sqrt, sin, cos).
We can create a math.ts file in the $lib folder containing a function to extract symbols and assignments from a node.
import type { AssignmentNode, MathNode, SymbolNode } from 'mathjs';

const CONSTANTS = [
    'e',
    'E',
    'pi',
    'PI',
    'i',
    'Infinity',
    'LN2',
    'LN10',
    'LOG2E',
    'LOG10E',
    'NaN',
    'phi',
    'SQRT1_2',
    'SQRT2',
    'tau'
];

const EXCLUDED_SYMBOL_PARENTS = ['AssignmentNode', 'FunctionNode'];

export function parseNodes(node: MathNode) {
    const symbols: string[] = [];
    const assignments: string[] = [];

    node.traverse((node, _path, parent) => {
        if (node.type === 'SymbolNode' && !EXCLUDED_SYMBOL_PARENTS.includes(parent.type)) {
            // If a symbol isn't part of the assignment
            // and isn't a function (e.g. sqrt, sin, tan)
            const name = (node as SymbolNode).name;
            if (!CONSTANTS.includes(name)) {
                // Don't allow constants to be changed
                symbols.push(name);
            }
        } else if (node.type === 'AssignmentNode') {
            assignments.push(((node as AssignmentNode).object as SymbolNode).name);
        }
    });

    return { symbols, assignments };
}
Now add the following reactive statement to the page file:
<script lang="ts">
    // ...
    let node: MathNode;
    let symbols: string[] = [];
    let assignments: string[] = [];
    let variables: Formula['variables'] = {};

    $: {
        try {
            node = parse(math);

            latex = node.toTex();

            ({ symbols, assignments } = parseNodes(node));

            variables = Object.fromEntries(symbols.map((symbol) => [symbol, { label: '', base: 0 }]));
        } catch (err) {
            error = (err as Error).name;
        }
    }
    // ...
</script>

<!-- ... -->

<div class="p-4 text-center container mx-auto">
    <!-- ... -->

</div>
Note the variables state is used by the TableInput component we define later. Add the following to now display the assignments used, and the table to edit the variable metadata:
<!-- ... -->

<div class="p-4 text-center container mx-auto">
    <!-- ... -->

    <div class="p-4 flex justify-center items-center space-x-3">
        <!-- Shows the symbol used at the left-hand side of the formula -->
        {#each assignments as assignment}
            <div class="bg-gray-200 rounded-md px-4 py-2 w-10 shadow">{assignment}</div>
        {/each}
    </div>
    <FormulaInput on:input={() => (error = '')} bind:math />
    <div class="mx-auto w-3/4 text-center mt-10">
        <h3 class="font-semibold text-xl">Variables</h3>
        <div class="flex flex-row justify-space-around space-x-8 border-b-2 uppercase font-medium">
            <span class="flex-1">Name</span>
            <span class="flex-1">Label</span>
            <span class="flex-1">Default</span>
        </div>
        <TableInput
            creating
            bind:variables
            on:updateNum={(e) => (variables[e.detail.symbol].base = e.detail.num)}
        />
    </div>
</div>
The creating prop tells the component to edit the "base" value and to display an input field for the label. This is because we will reuse it for the main formula page.
Now we can finish this page by adding a function to submit data to Firestore:
<script lang="ts">
    // ...
    const user = userStore(auth);

    const onSubmit = async () => {
        if (!$user) return;

        const data: Formula = {
            userId: $user.uid,
            author: $user.displayName ?? `User (${$user.uid})`,
            formula: math,
            title,
            variables
        };

        const docRef = await addDoc(formulaeCol, data);
        const id = docRef.id;

        // View the formula's page
        await goto(`/${id}`);
    };

    $: disabled = !($user && title && math);
    $: buttonTitle = !$user ? 'Need to be logged in' : '';
</script>

<!-- ... -->

<div class="p-4 text-center container mx-auto">
    <!-- ... -->
    <div class="mt-5 flex flex-row justify-end">
        <FormulaSubmitButton title={buttonTitle} {disabled} on:click={onSubmit} />
    </div>
</div>
$lib/FormulaSubmitButton.svelte:
<script lang="ts">
    export let disabled = false;
    export let title: string;
</script>

<button
    {title}
    {disabled}
    on:click
    type="submit"
    class="disabled:bg-gray-300 disabled:text-gray-600 disabled:shadow-none bg-gray-400 hover:bg-gray-400/75 rounded-xl px-5 py-2 text-lg text-white shadow-[4px_5px_0] shadow-gray-500"
>
    Create
</button>
Editing Variables with a Table
Each row in the table will represent a variable (symbol). The first column shows the symbol. Then the second column can display an input to update the label if "creating" is true. And the last column shows an input to edit either the base (default) value or the actual value.
Add the following code to $lib/TableInput.svelte:
<script lang="ts">
    import clickOutside from '$lib/clickOutside';
    import { createEventDispatcher } from 'svelte';

    export let variables: { [key: string]: { value?: number; base?: number; label: string } };

    export let creating = false;

    const cellClassName = 'w-full h-full flex items-center justify-center text-center bg-transparent';

    let activeSymbol = '';

    const dispatch = createEventDispatcher<{
        updateNum: { symbol: string; num: number };
        updateLabel: { symbol: string; label: string };
    }>();
</script>

<div class="rounded-xl bg-gray-200 p-5 divide-y divide-white">
    {#each Object.keys(variables) as symbol}
        <!-- Svelte is cool like this -->
        {@const { label, value, base } = variables[symbol]}

        <!-- Holds the value to update and display-->
        {@const num = creating ? base : value}
        <div
            title={label}
            class="h-10 flex flex-row items-center justify-around divide-x-4 divide-white text-md"
        >
            <span class={cellClassName}>
                <!-- Making use of the styles provided by MathJax -->
                <mjx-c class="TEX-I">{symbol}</mjx-c>
            </span>
            {#if creating}
                <input
                    type="text"
                    value={label}
                    on:input={(e) => {
                        dispatch('updateLabel', { symbol, label: e.currentTarget.value });
                    }}
                    placeholder="Mention units"
                    class={`${cellClassName} outline-none`}
                />
            {/if}
            {#if activeSymbol === symbol}
                <!-- svelte-ignore a11y-autofocus -->
                <input
                    type="number"
                    class={`${cellClassName} outline-none`}
                    use:clickOutside
                    autofocus
                    value={num}
                    on:outclick={(e) => {
                        if (e.detail.target instanceof HTMLInputElement) {
                            if (e.detail.target.value === '') {
                                e.detail.target.value = '0';
                            }

                            dispatch('updateNum', { symbol, num: e.detail.target.valueAsNumber });
                        }

                        activeSymbol = '';
                    }}
                />
            {:else}
                <button
                    type="button"
                    class={`${cellClassName} hover:text-gray-500`}
                    on:click={() => (activeSymbol = symbol)}>{num}</button
                >
            {/if}
        </div>
    {:else}
        <h3 class="text-xl">No variables to display</h3>
    {/each}
</div>
The clickOutside action can be found in the GitHub repository linked at the end.
Viewing a Formula
The +page.svelte for this route will come from src/routes/[id].
In SvelteKit, we have access to the page store holds the page's URL parameters.
Create the file and add the following script:
<script lang="ts">
    import { page } from '$app/stores';
    import { formulaeCol } from '$lib/firestore';
    import { parseNodes } from '$lib/math';
    import type { Formula } from '$lib/types';
    import { doc, getDoc } from 'firebase/firestore';
    import { Math } from '$lib/mathjax-svelte';
    import { parse, type MathNode } from 'mathjs';
    import TableInput from '$lib/TableInput.svelte';
    import FormulaResult from '$lib/FormulaResult.svelte';

    const id = $page.params.id;

    let formula: Formula | undefined;

    let node: MathNode;

    // For MathJax rendering
    let latex = '';

    // Reprsents the keys for the variable scope for evaluation
    let symbols: string[] = [];

    // Stores the left-hand symbol in the formula
    let assignments: string[] = [];

    // Used for scope values and hover labels
    let variables: { [key: string]: { label: string; value: number } } = {};

    (async () => {
        const snap = await getDoc(doc(formulaeCol, id));
        formula = snap.data() as Formula;
        node = parse(formula.formula ?? '');

        latex = node.toTex();

        ({ symbols, assignments } = parseNodes(node));

        // Initially set values to defaults
        variables = Object.fromEntries(
            symbols.map((symbol) => {
                const { label, base } = (formula as Formula).variables[symbol];
                return [symbol, { label, value: base }];
            })
        );
    })();
</script>
And as for the markup, we can begin by displaying the title and author. Then we can display the latex with MathJax:
<svelte:head>
    <title>{formula?.title ?? 'Loading...'}</title>
</svelte:head>

<div class="p-4 text-center relative">
    <!-- Handle loading state for the document -->
    <h2 class="text-3xl font-semibold">{formula?.title ?? 'Loading...'}</h2>
    {#if formula}
        <sub class="text-lg">By {formula.author}</sub>
    {/if}
    <Math
        class="bg-gray-300/50 rounded-2xl mt-12 h-24 flex justify-center items-center text-2xl"
        t={latex}
    />
</div>
When the user changes the value for each variable, we can present them with the output of the formula. Add the following to $lib/FormulaResult.svelte:
<script lang="ts">
    export let assignments: string[];
    export let output: number;
</script>

<div class="mx-auto w-1/4 mt-10">
    <h3 class="font-semibold text-xl">Output</h3>
    <div class="bg-gray-300 rounded-xl p-4">
        {#each assignments as assignment}
            <p>{assignment} = {output}</p>
        {/each}
    </div>
</div>
And in our page, we can convert our variables object into a mapping of symbol to value. Then we use mathjs to evaluate our formula node with these values:
<script lang="ts">
    // Form an object mapping symbol name to value
    $: output = node?.evaluate(
        Object.fromEntries(symbols.map((symbol) => [symbol, variables[symbol].value]))
    );
</script>

<!-- ... -->

<div class="p-4 text-center relative">
    <!-- ... -->

    <FormulaResult {assignments} {output} />
</div>
Now, just like before, we render a TableInput , but without the creating prop. This means that only name and value will be shown in the columns:
<!-- ... -->

<div class="p-4 text-center relative">
    <!-- ... -->

    <div class="mx-auto w-3/4 text-center mt-10">
        <h3 class="font-semibold text-xl">Variables</h3>
        <div class="flex flex-row justify-space-around space-x-8 border-b-2 uppercase font-medium">
            <span class="flex-1">Name</span>
            <span class="flex-1">Value</span>
        </div>
        <TableInput
            bind:variables
            on:updateNum={(e) => (variables[e.detail.symbol].value = e.detail.num)}
        />
    </div>
</div>
Wrapping Things Up
Try running npm run dev in your terminal and behold this new SvelteKit project.
In summary, we made use of Firebase to handle Google Authentication and document storage. Then we displayed each formula to the user with the new svelte-fire library. We also created a table-style form to create formulas and change variable values. Finally, we used my new NPM library to render latex math.
To improve this project, we could clean up the UI and add a search feature for formulae. And if you read through the repository, you will see the edit feature I implemented.
If you want to develop this application further, here is the repo.
Thanks for reading this far. See you soon!
References
Build Documentation | Firebase Documentation (google.com)
Introduction • Docs • SvelteKit
math.js | an extensive math library for JavaScript and Node.js (mathjs.org)
(3) The easiest realtime app I’ve ever built - YouTube