

Make Your AI-Powered Assistant Play Music! (Featuring Web3)
Integrate the Houndify API to make a personal assistant like Alexa or Siri

I am a developer with 7 years of experience. At the moment I am working on building cool projects with JavaScript and the web for people to enjoy.
In the last article, we set up our application and added audio visualization with Wave.js. Now we'll make the client play music. The demo below shows what we are trying to do.
First, the server downloads the song from YouTube. Then, it uploads the file to a decentralised storage network. Finally, the client retrieves the file and plays it.
Setting up
If you didn't read the last article in the series, I would recommend following it first.
But if you'd rather start afresh, the starter code can be found here.
Remember how the Houndify dashboard had domains that required client integrations to function? Well now here are two of them.
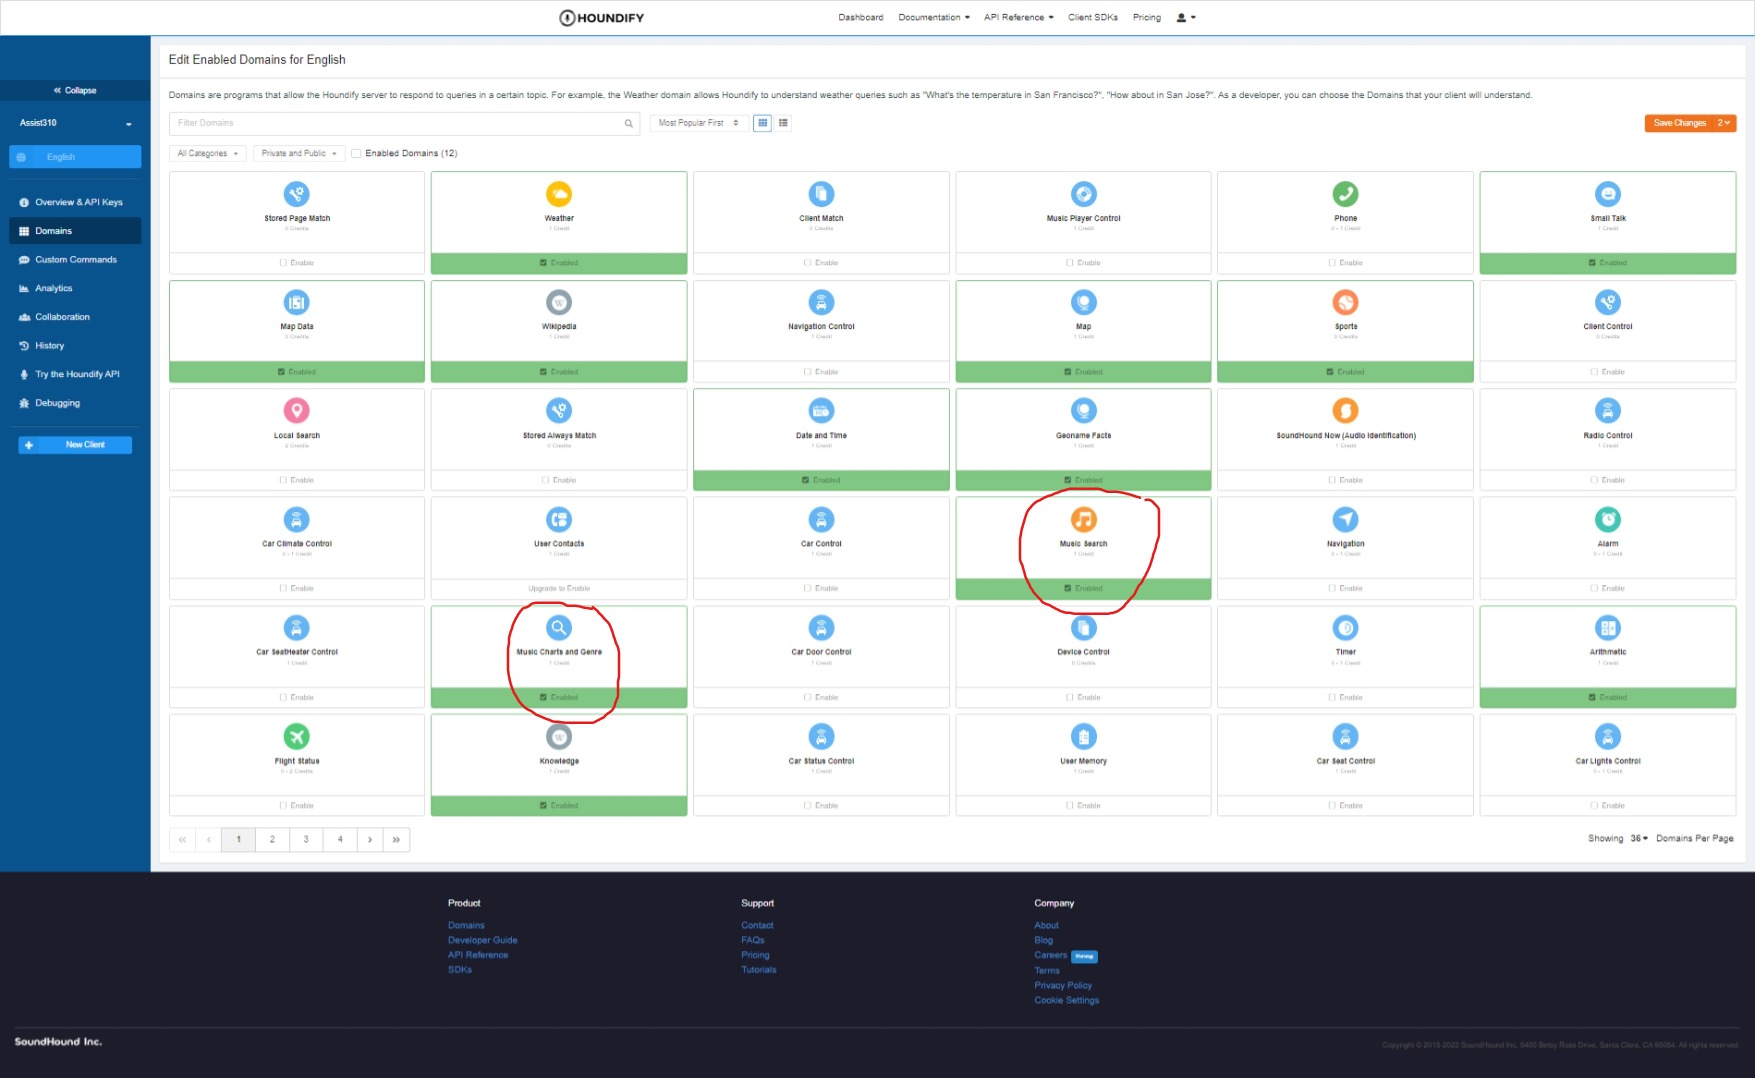
Enable these two domains then click save changes in the top-right of the page. These will allow the user to request a certain song, play a song from music charts, or specify a genre.
Initiating command handlers
Now that those domains are enabled, go back to your editor, open up src/App.tsx and insert this code:
...
import handleCommand from "./handlers";
...

function App() {
    ...
    const handleResult = async (result: any) => {
        let newResult = await handleCommand(result);
        say(newResult.SpokenResponseLong);
    };
    ...
}
If the user's command requires extra logic, handleCommand will transform the result.
Create a file named index.ts in a new src/handlers directory and insert the following code:
const COMMANDS = ["MusicCommand"];

export default async function handleCommand(result: any) {
    const command = result.CommandKind;
    if (!COMMANDS.includes(command)) return result;

    const { default: commandHandler } = await import(`./${command}`);

    return await commandHandler(result);
}
First, COMMANDS stores the Houndify commands the client is capable of handling. MusicCommand is the command that allows the music playing and charts feature.
Then the function takes in our result object and looks at the command. If we are able to handle it, we can import the handler from the folder and use that. If not, it returns the same result with a default response.
Handling the Music Command
Wait, how will this actually work?
Well, when the user requests a song, the result contains info like the track name and artist. It also contains two new versions of a result. We use them when the client is about to play the song. If successful, we return the AutoPlayResult and AutoPlayFailedResult otherwise.
We will then use the track name and artist to find a corresponding YouTube video. We then upload it to the server. Then on the front end, we retrieve the file and then play the audio.
First, define these two constants:
const SUCCESS_RESULT = "AutoPlayResult";
const FAILED_RESULT = "AutoPlayFailedResult";
Then, create a handle function which will be the main part of the handler:
// src/handlers/MusicCommand.ts

export default function handle(result: any) {
    // If there is no successful result
    // then no song will be able to play
    if (!result[SUCCESS_RESULT]) {
        return result;
    }

    switch (result.MusicCommandKind) {
        // Both music command kinds have
        // the same data, it's a track
        case "MusicChartsCommand":
        case "MusicSearchCommand":
            return handleMusicCommand(result);
        default:
            return result;
    }
}
Then add the following code which outlines what we discussed:
import playSound from "../lib/playSound";
import { Howler } from "howler";

...

const handleMusicCommand = async (result: any) => {
    try {
        let track = result.NativeData.Tracks[0];
        const cid = await downloadTrack(track);
        const audioURL = await retrieveFileURL(cid);

        Howler.stop();
        playSound(audioURL, { format: "webm" });

        // Play music
        return result[SUCCESS_RESULT];
    } catch {
        return result[FAILED_RESULT];
    }
};
We'll get back to the cid variable later. It's part of the web3 bonus!
We can then create a helper function to create an optimised search query from the track info. And then an extra function to call the new endpoint from our server.
const getTitle = (title: string, artist: string) => {
    return `${title} ${artist}`
        .toLowerCase()
        .replace(/ *\([^)]*\) */g, "")
        .replace(/ *\[[^\]]*]/, "")
        .replace(/feat.|ft./g, "")
        .replace(/\s+/g, " ")
        .trim();
};

const downloadTrack = async (track: any) => {
    let title = getTitle(track.TrackName, track.ArtistName);

    let { data } = await axios.post("/yt-download", null, {
        params: { q: title },
    });

    return data.cid as string;
};
For the first endpoint, we will have to use the YouTube Data API to search for a video and return the video ID. So, let's jump over to the server we created last time and do that.
Using the YouTube Data API
You can find a guide here to set up the API and retrieve the API key.
Once that is set up, add the API key to the .env file like so:
...
YOUTUBE_DATA_API_KEY={YOUR_API_KEY}
Let's first install body-parser to parse JSON data from a request. And then youtube-search to wrap around the API.
npm i body-parser youtube-search
Then, add the following code to the server.js file:
const bodyParser = require("body-parser");
const search = require("youtube-search");

...

app.use(bodyParser.json());

...

const searchYT = async (q) => {
    const { results } = await search(q, {
        key: process.env.YOUTUBE_DATA_API_KEY,
        maxResults: 3,
    });
    const result = results[0];

    return result.id;
};
Now we can define the route to download the video from YouTube and return a reference to the file.
Downloading the YouTube video
On the server side, we will use a program called yt-dlp to extract the video from YouTube. It then makes use of [ffmpeg] to convert the video to audio.
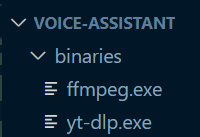
You can download the binary file for yt-dlp here, and you can get ffmpeg here.
Save the binary files into a folder named binaries in your project. The folder should look like this:
Now we must install the yt-dlp-wrap library to handle executing the commands to yt-dlp:
npm i yt-dlp-wrap
Then the following code would download any given video from YouTube by its ID:
const { default: YTDlpWrap } = require("yt-dlp-wrap");

const ytDlpWrap = new YTDlpWrap("./binaries/yt-dlp.exe");

// lo-fi hip hop music on YouTube
const id = "lTRiuFIWV54";
const filename = `public/songs/${id}.webm`;

const args = [
    `https://www.youtube.com/watch?v=${id}`,
    "-f",
    "ba",
    "--ffmpeg-location",
    ".",
    "-o",
    filename
];

ytDlpWrap.exec(args)
But uploading all the song files to the server's public folder isn't much of a good idea. There are 3rd party services out there which are better optimised for file storage. In this tutorial, we will be using Web3.Storage which uses the decentralised web to store files. There are two reasons I'm using it:
- You get 1 TB of storage completely free (yes, free!)
- It's quite simple to get started after reading the quick start here.
Bonus - Decentralised storage
Add your API key to the .env file like so:
REACT_APP_WEB3_STORAGE_TOKEN={YOUR_KEY}
Installing Web3.Storage
Now install web3.storage with the following command:
npm i web3.storage
Uploading YT vids to Web3.Storage
We can first define a function to download a video with yt-dlp and stream the output to our storage provider.
// server.js

...

const { Web3Storage } = require("web3.storage");

...

const web3Storage = new Web3Storage({
    token: process.env.REACT_APP_WEB3_STORAGE_TOKEN,
});

const uploadYTToWeb3 = async (ytID) => {
    const ytdlpArgs = [
        `https://www.youtube.com/watch?v=${ytID}`,
        "-f",
        "ba",
        "--ffmpeg-location",
        ".",
    ];

    const filename = `${ytID}.webm`;
    let cid = await web3Storage.put([
        { name: filename, stream: () => ytDlpWrap.execStream(ytdlpArgs) },
    ]);

    return cid;
};
Now we can add our final API route for this tutorial:
app.post("/yt-download", async function (req, res) {
    try {
        const ytID = await searchYT(req.query.q);
        const cid = await uploadYTToWeb3(ytID);

        res.json({
            cid,
        });
    } catch (error) {
        res.status(500).send(error);
    }
});
Now move over to the front end. Add the following code to retrieve the file in the MusicCommand handler:
// src/handlers/MusicHandler.ts

import { Web3Storage } from "web3.storage";

//@ts-ignore
const web3Storage = new Web3Storage({
    token: process.env.REACT_APP_WEB3_STORAGE_TOKEN as string,
});

const retrieveFileURL = async (cid: string) => {
    const storageRes = await web3Storage.get(cid);
    const files = await storageRes?.files();

    if (!files) throw new Error();

    const audioURL = URL.createObjectURL(files[0]);

    return audioURL;
};
Remembering previous songs
At this moment, you may be wondering how efficient this is. Each time we call the route, the server downloads the video, regardless of which video we request. So if we ask for the same song again, the server will take the same amount of time to respond.
We can speed this up by storing a JSON file named song_cids.json. It will contain a mapping of YouTube IDs to storage CIDs (Content Identifiers). So, if the video ID we request is in the file, we can bounce back with a suitable CID for the file.
Add the following to the server code:
// server.js

const { existsSync } = require("fs");
const fs = require("fs/promises");

const cidFilename = "song_cids.json";

const saveCIDMapping = async (ytID, cid) => {
    let data = await readCIDFile();
    data[ytID] = cid;
    await fs.writeFile(cidFilename, JSON.stringify(data));
};
Now, extend the route like so:
app.post("/yt-download", async function (req, res) {
    try {
        const ytID = await searchYT(req.query.q);

        // Check if we downloaded the song before
        let cid = (await readCIDFile())[ytID];
        if (cid) {
            return res.json({ cid });
        }

        cid = await uploadYTToWeb3(ytID);
        res.json({
            cid,
        });
    } catch (error) {
        res.status(500).send(error);
    }
});
Toast notifications
If you spin up the dev server now, try to request a song. There's at least a five second wait and there's not even a way of telling what's even going on! To provide extra visual feedback, we can use the react-toastify library. With it, we can add elegant toast notifications with ease. Install it with this line:
npm i react-toastify
Open src/App.tsx and import the files we need:
import { ToastContainer } from "react-toastify";
import "react-toastify/dist/ReactToastify.css";
Then add the ToastContainer within the component like so:
<div className={styles.root}>
    <h1 className={styles.h1}>Assist310</h1>
    <VoiceInput transcription={transcription} />
    {error && <div className={styles.errorContainer}>{error}</div>}
    <ToastContainer />
</div>
Now open up src/handlers/MusicCommand.ts and alter the handle function:
export default function handle(result: any) {
    if (!result[SUCCESS_RESULT]) {
        return result;
    }

    switch (result.MusicCommandKind) {
        case "MusicChartsCommand":
        case "MusicSearchCommand":
            const onResponse = ({ data }: ToastContentProps<any>) => {
                return data.SpokenResponse;
            };

            return toast.promise(
                handleMusicCommand(result),
                {
                    pending: "Downloading...",
                    success: {
                        render: onResponse,
                    },
                    error: {
                        render: onResponse,
                    },
                },
                { type: "info" }
            );
        default:
            return result;
    }
}
Finally...
And that's all! We used yt-dlp to download videos from YouTube, and web3.storage to store the downloaded songs. You can find all the code for this tutorial at this branch of my repo and play around with it. Stay tuned for the next part of the series where we'll actually be able to pause the song. This prevents you from having to listen to the whole song if you later decide it's not the one for you. Enjoy!
Resources
Storing Data on IPFS using Web3.Storage!
Handling promises | React-Toastify
MusicCommand API Reference | Houndify Docs


