

Add a Pokédex to Your AI-Powered Assistant
View stats of different Pokémon with the Pokémon API

I am a developer with 7 years of experience. At the moment I am working on building cool projects with JavaScript and the web for people to enjoy.
Greetings. In this article, we will add a Pokedex to our AI assistant.
Setting Up
If you missed the last article, read it to understand how we add new command handlers.
If you want to start anew, the starter code is available here.
First, enable the ClientMatch command:
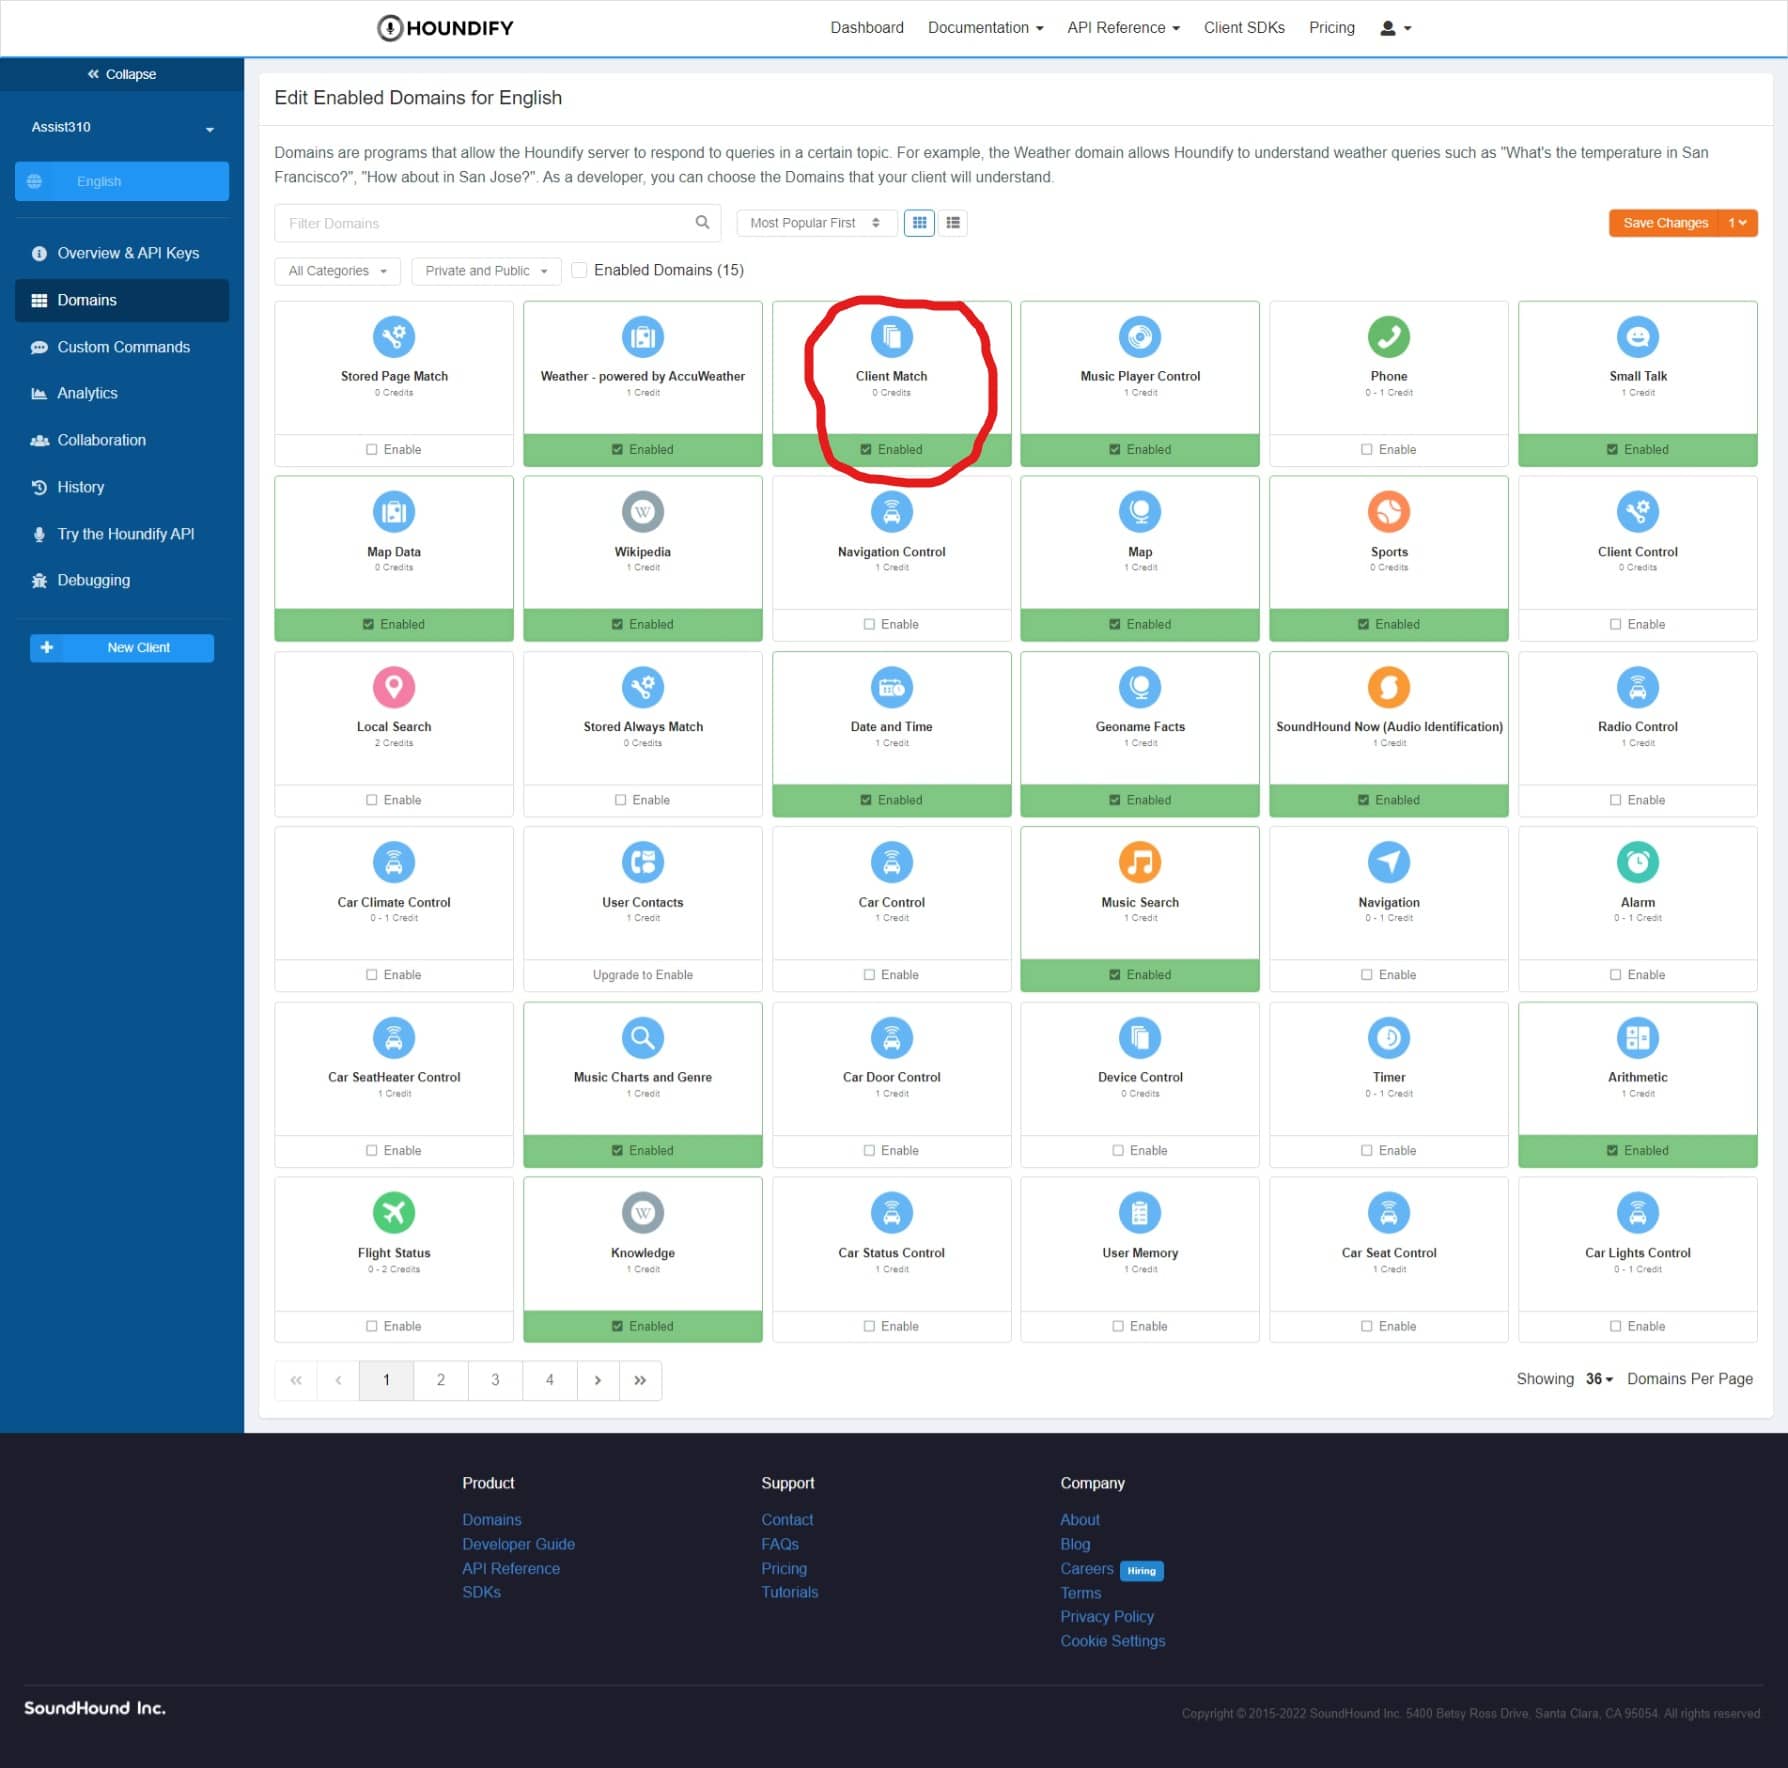
Enable and click Save Changes in the top right. This domain will enable us to create our commands. We need custom commands since Houndify doesn't have built-in support for a Pokedex.
Creating a Custom Command
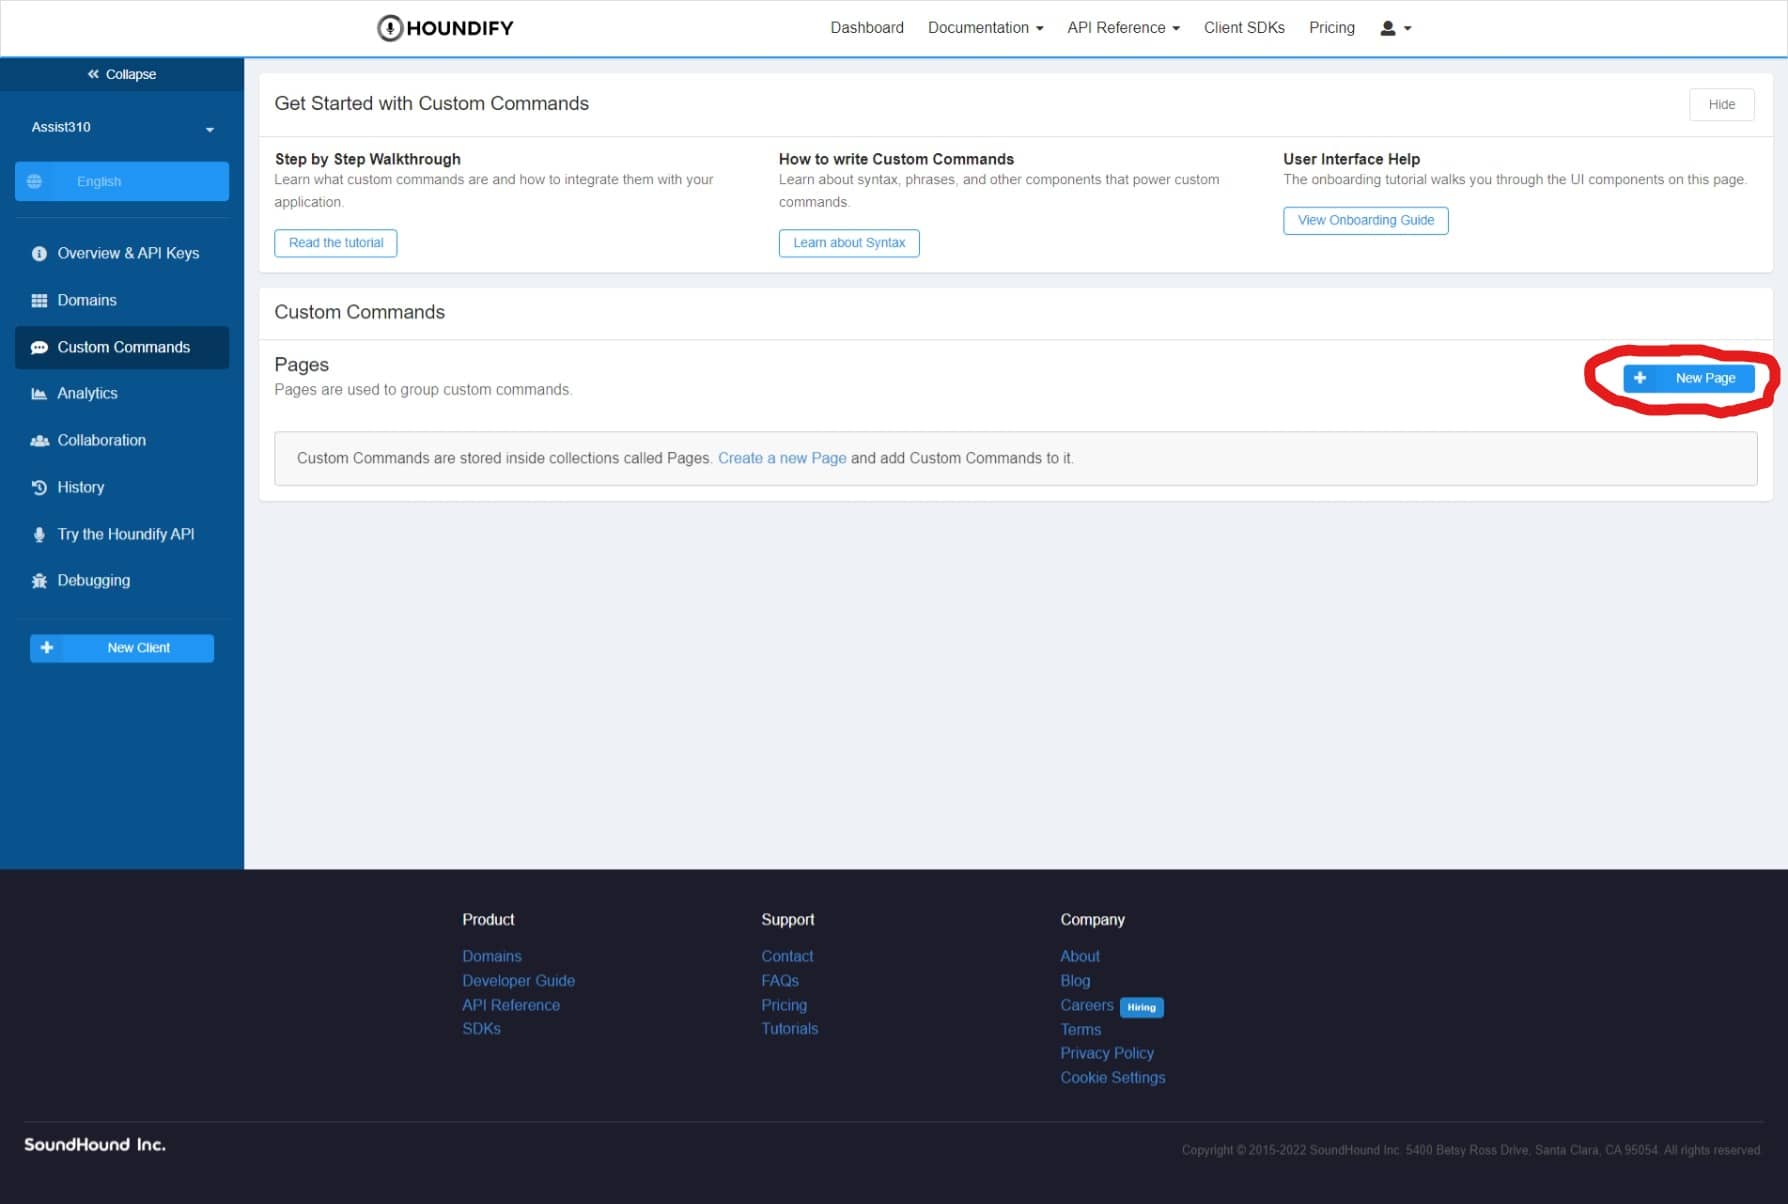
Click on Custom Commands in the sidebar, then click New Page. Name the new page something simple, "Pokemon".
Next, you need to create a new command which will trigger the client to open the Pokedex. Fill in the details like so.
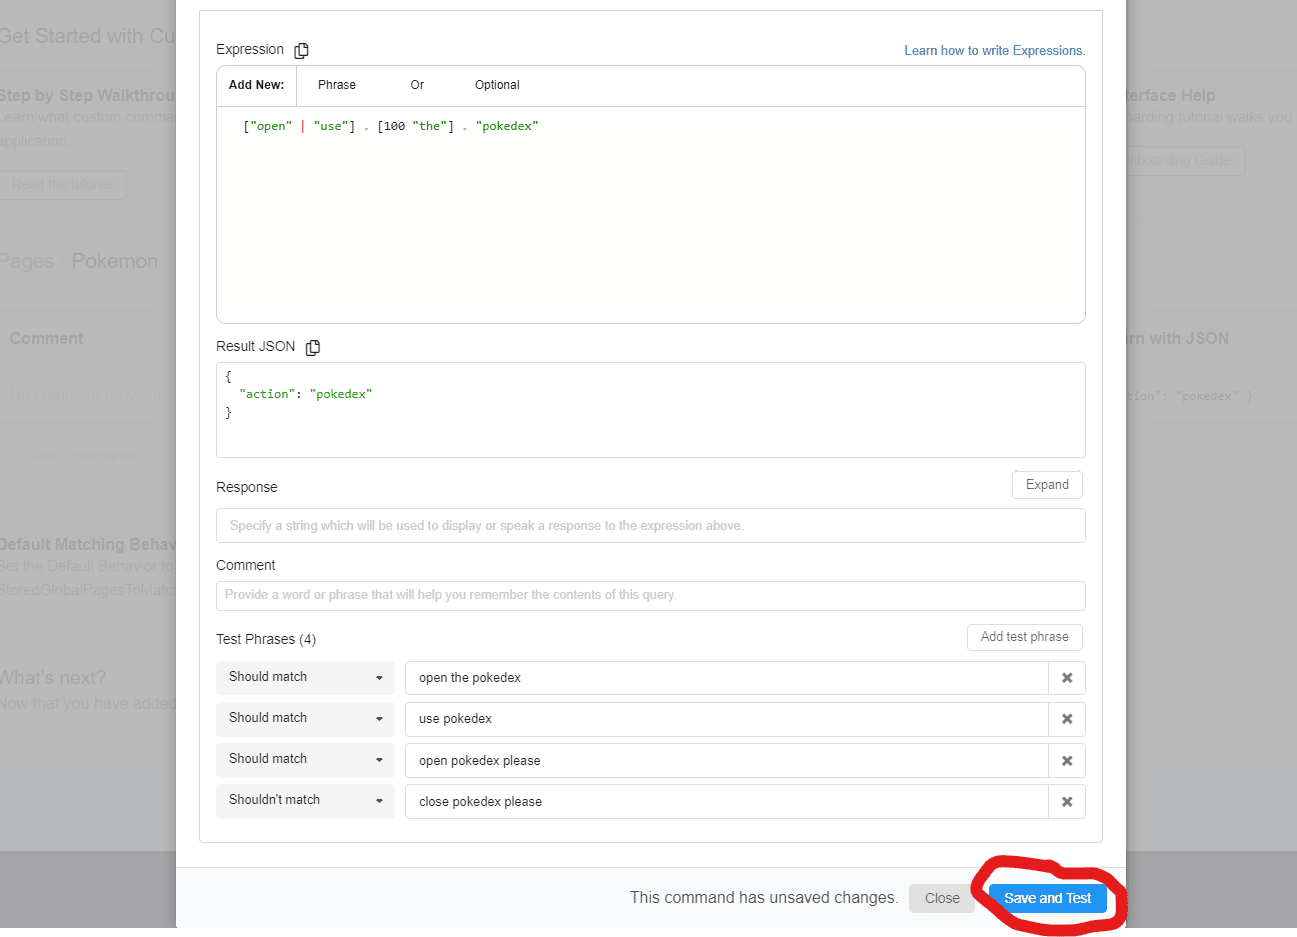
The expression shows the query needed to trigger the command. The result JSON contains the data sent to the client when we run the command.
We leave the response empty as we will create it based on the Pokémon's stats.
Switch to the configure tab of the dialogue. Click on Imperative Phrase. Now the user can add something such as "please" to the end of the command.
Click Save and Test. You should see all tests pass if you have configured everything correctly.
Handling the Client Match Command
Create a new handler file, as seen in the last article. Name it ClientMatchCommand.ts.
Complete the file with the following code:
import handlePokedexCommand, {
    updatePokemonKeys,
} from "./ClientMatch/handlePokemonCommand";

export default async function handle(result: any) {
    switch (result.Result.action) {
        case "pokedex":
            await updatePokemonKeys();
            return handlePokedexCommand(result);
    }
}
We check if we need the Pokedex from the result JSON. We then call updatePokemonKeys to get the object keys for a response from our Pokedex. More on that later.
And don't forget to include our new handler in the handlers array.
const COMMANDS = [
    "MusicCommand",
    "MusicPlayerCommand",
    "SoundHoundNowCommand",
    "ClientMatchCommand",
];
Reading Pokemon Data
To get data from the Pokemon API, we'll install a wrapper for it from NPM named pokenode-ts.
npm i pokenode-ts
Create a new file in a folder named ClientMatch in the handlers directory. Name the file handlePokemonCommand.ts.
Import the library and initialise a new object at the top of the file like so:
import { PokemonClient } from "pokenode-ts";

const pokedex = new PokemonClient();
Now we need to define a function that formats the Pokedex data, for use by the client. The fields include some basic properties along with extra stats.
const parsePokemonData = (data: {
    [key: string]: any;
}): { [key: string]: any } => {
    let stats: { [key: string]: number } = {};
    let statData;

    for (let i = 0; i < data.stats.length; i++) {
        statData = data.stats[i];
        stats[statData.stat.name.replace("-", " ")] = statData.base_stat;
    }

    return {
        name: data.name,
        id: data.id,
        height: data.height * 10 + "cm",
        weight: data.weight / 10 + "kg",
        moves: data.moves.map((move: any) => move.move.name).join(", "),
        types: data.types.map((type: any) => type.type.name).join(", "),
        abilities: data.abilities.map((ability: any) => ability.ability.name),
        ...stats,
    };
};
Handling a Pokedex Command
Now we need to define the default export for this file. First, it prompts the user to enter the pokemon's name and desired attribute. It then gets that information and changes the client's response.
Add the following code to the file:
export default async function handlePokedexCommand(result: any) {
    try {
        let name = window.prompt("Enter pokemon name");
        let stat = window.prompt("Enter stat");

        if (!name) {
            throw new Error("Invalid name");
        }

        if (!stat) {
            throw new Error("Invalid stat");
        }

        name = name.toLowerCase();
        stat = stat.toLowerCase();

        const pokemonData = await pokedex.getPokemonByName(name);
        const data = parsePokemonData(pokemonData);
        const statValue = data[stat];

        const response = `${name}'s ${stat} is ${statValue}`;

        return { ...result, SpokenResponseLong: response };
    } catch (error: any) {
        let response = "Unable to access pokemon data";

        if (error.response?.status === 404) {
            response = "Pokemon not found";
        }

        return { ...result, SpokenResponseLong: response };
    }
}
And we also need to define our pokemonKeys array. It contains the keys of the result type of parsePokemonData.
Insert the following at the top of the file:
let pokemonKeys: string[];

export const updatePokemonKeys = async () => {
    if (pokemonKeys) return pokemonKeys;

    const firstPokemonData = await pokedex.getPokemonById(1);
    const data = parsePokemonData(firstPokemonData);
    pokemonKeys = Object.keys(data);
    return pokemonKeys;
};
This will cache the value of the keys, using sample pokemon data (id 1).
Conclusion
The source code for this article is published here. If you found this useful, make sure to share it with others.
Stay tuned for the final part of this series, where we will deploy our application to the web!


